
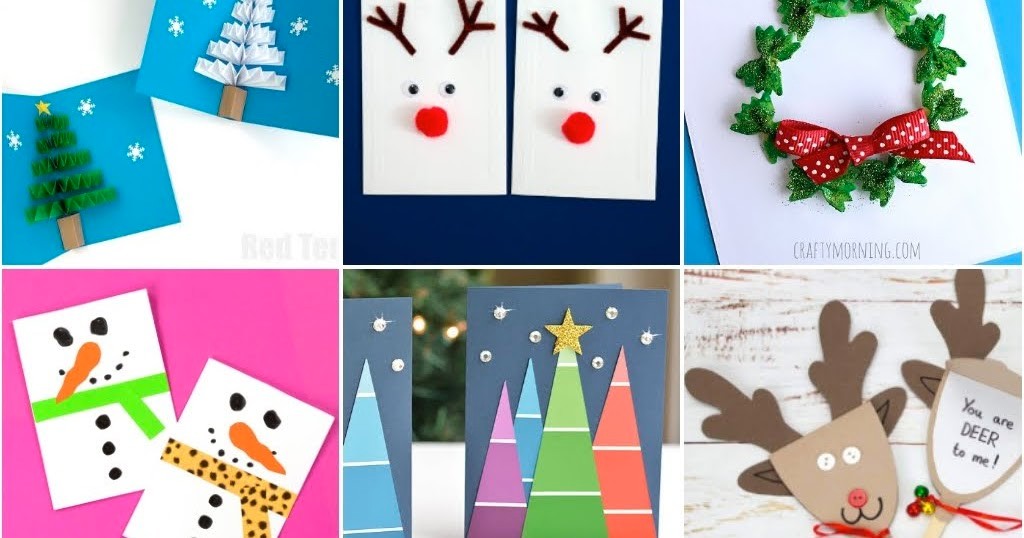
Winter is a wonderful time of the year and if you want to make a special card to celebrate the birthday of your loved one during this season, then this guide will help you to make a beautiful winter birthday card. With a few supplies and some creativity, you can easily make a card that will bring a smile to your recipient’s face.
To start, gather all of the supplies you will need. This can include 12×12 cardstock in different colours, scissors, a hole punch, glue, glitter, markers, ribbon, and any other embellishments you would like to use. You can also find pre-cut card shapes or outlines that you can use to make your card. Once you have all of your supplies, you can begin to design the card. Start by cutting out a white card shape from the card stock. This will be the base of your card.
You can also cut out a smaller shape from a different coloured cardstock to serve as the main focus of your card. This could be a translucent vellum paper snowflake, winter tree, snowman, or anything else related to winter.
Once you have your shapes cut out, you can start to decorate your card. Use the markers to draw snowflakes, snowmen, and other wintery shapes around the edges of the card. Add some glitter to the shapes to give them a sparkly look. You can also use the hole punch to add small circles to the Bazzill cardstock papers to serve as snowballs.
For the finishing touch, add a ribbon to the top of your card. This will give it a festive look and will add a nice touch to the card. Finally, write the recipient’s name and a birthday message on the card with the markers.
Your winter birthday card is now complete! You can give it to your loved one on their special day and they will be sure to appreciate the thought and effort you put into making it. With a few simple supplies and some creativity, you can make a beautiful winter birthday card that will bring a smile to your recipient’s face.
Winter is a beautiful season to celebrate a birthday! The cold temperatures and snowfall make for a cosy and beautiful atmosphere to celebrate in. For those of you who are looking to make a special winter birthday card for a loved one, here is a step-by-step guide on how to make a winter birthday card.
Step 1: Gather Your Supplies
To make a winter birthday card, you will need a few items. You will need some Glitter cardstock, a pair of scissors, a ruler, glue, and any decorations you want to use, such as glitter, stickers, and ribbon.
Step 2: Cut the Cardstock
Using the ruler and the scissors, cut the cardstock into a rectangular shape. You can make the card as big or as small as you like.
Step 3: Decorate the Card
Now it’s time to get creative! Decorate the card with glitter, stickers, ribbon, and anything else you may have. You can make the card as simple or as extravagant as you like.
Step 4: Write the Message
Once the card is decorated, it’s time to write the message. Think of something special and heartfelt to write to the person you are giving the card to.
Step 5: Assemble the Card
Once the card is decorated and the message is written, it’s time to assemble the card. Using adhesives, adhere the decorations to the card.
Step 6: Give the Card
Once the card is assembled, it’s time to give it to the person you are giving it to. Give the card with a smile and enjoy the look on their face when they open it!
Making a winter birthday card is an easy and fun way to show someone you care. With a few simple steps, you can make a beautiful winter birthday card that will be sure to make someone’s day special.

